On June 10th 2024 Apache Iceberg tables became generally available on Snowflake. This blog will focus on creating Iceberg tables on Snowflake and illustrate how this is integrated with dbt.
What are Iceberg Tables?
Iceberg tables utilize the Apache Iceberg open table format, which acts as an abstraction layer over data files stored in open formats such as Parquet, ORC, and Avro. Like Delta Lake, Apache Iceberg brings transactional consistency and structured table management to unstructured data lakes, effectively turning them into high-performance data lakehouses. Users can interact with Iceberg tables using SQL, much like in a relational database, while actually working directly with underlying data files.
A core component of Iceberg is the catalog, which maintains metadata about tables, including schemas, snapshots, and partition layouts. Serving as a centralized source of truth, the catalog enables efficient query optimization and incremental updates. Snowflake supports querying Iceberg tables through either external catalogs or a Snowflake-managed catalog, allowing users to analyze externally stored data while taking advantage of Snowflake’s compute engine.

Analysing the usage of Iceberg tables
Snowflake traditionally functions as a data warehouse—a fully managed platform optimized for structured data and analytics. However, with the rise of data lakehouses, which offer greater flexibility for handling both structured and unstructured data, Snowflake has embraced Apache Iceberg to meet this demand. By supporting Iceberg tables, Snowflake enables users to store data outside its internal storage, allowing them to keep data in their own cloud accounts while seamlessly querying and processing it within Snowflake.
Benefits
Flexibility
Iceberg tables allow you to use external storage systems, reducing dependency on Snowflake’s internal storage and avoiding vendor lock-in.
Scalability
Designed for massive datasets, Iceberg optimizes queries with advanced partitioning, metadata pruning, and snapshot isolation.
Interoperability
Iceberg is compatible with various data processing engines, such as Spark and Hive, fostering a multi-tool ecosystem.
Time Travel and Versioning
It enables access to historical data, supporting use cases like auditing, debugging, and recovering previous table states.
Trade offs
Operational complexity
The management of external storage configurations, the assurance of data protection, and the establishment of recovery processes are the exclusive responsibility of the user.
Performance dependancy
Query performance can vary depending on the external storage system and catalog setup, requiring careful optimization.
How does it work?
Creating an Iceberg table requires adding a few extra parameters to the standard CREATE statement. These include specifying an external volume, a catalog, and a base location.
External volumes
First, we need to ensure that an external location is available for storing our data. This involves establishing a connection between Snowflake and the external storage. In Snowflake, this is achieved using an external volume, an account-level object that securely stores authentication details for accessing external storage. In this example, we will use an Amazon S3 bucket as the storage location.
					CREATE
OR REPLACE EXTERNAL VOLUME iceberg_volume STORAGE_LOCATIONS = (
    (
        NAME = 'my-s3-eu-west-1'
        STORAGE_PROVIDER = 'S3'
        STORAGE_BASE_URL = 's3://snowflakedatalakedemo/'
        STORAGE_AWS_ROLE_ARN = 'arn:aws:iam::000000000000:role/iceberg_role'
    )
);
Now that we have an external volume, we are getting closer to creating our iceberg table. Snowflake also expects us to provide a catalog and a base location.
Catalog
For our catalog, we will use Snowflake’s default catalog, which enables the compute engine to interact with and manage Iceberg tables. It does this through metadata pointers that track the location of table metadata. Users can choose between an external catalog or the Snowflake catalog, depending on their needs.
Base location
The base location defines where data will be stored within the external volume. For this demonstration, we’ll use iceberg_demo as the base location. Snowflake will treat this as the path within the external volume, creating two subdirectories: data for storing table data and metadata for tracking table changes. While a common practice is to name the base location after the table being created, this example will show that it’s not strictly required.
Creating the table
With the required parameters in place, we can now construct the command to create an Iceberg table. We begin with a standard CREATE TABLE statement. In this example, the table includes five columns: id, name, age, join_date, and department.
					CREATE OR REPLACE TABLE employees (id int, name text, age int, join_date date, department text)
  AS SELECT * FROM demo_source;
Now, let’s create the same table in Iceberg format using the external volume we set up earlier, the default Snowflake catalog, and the base location iceberg_demo. The table structure remains the same, and we will populate it with a few dummy records for demonstration purposes.
					CREATE OR REPLACE ICEBERG TABLE employees (id int, name text, age int, join_date date, department text)
  EXTERNAL_VOLUME = 'iceberg_volume'
  CATALOG = 'SNOWFLAKE'
  BASE_LOCATION = 'iceberg_demo'
  AS SELECT * FROM demo_source;
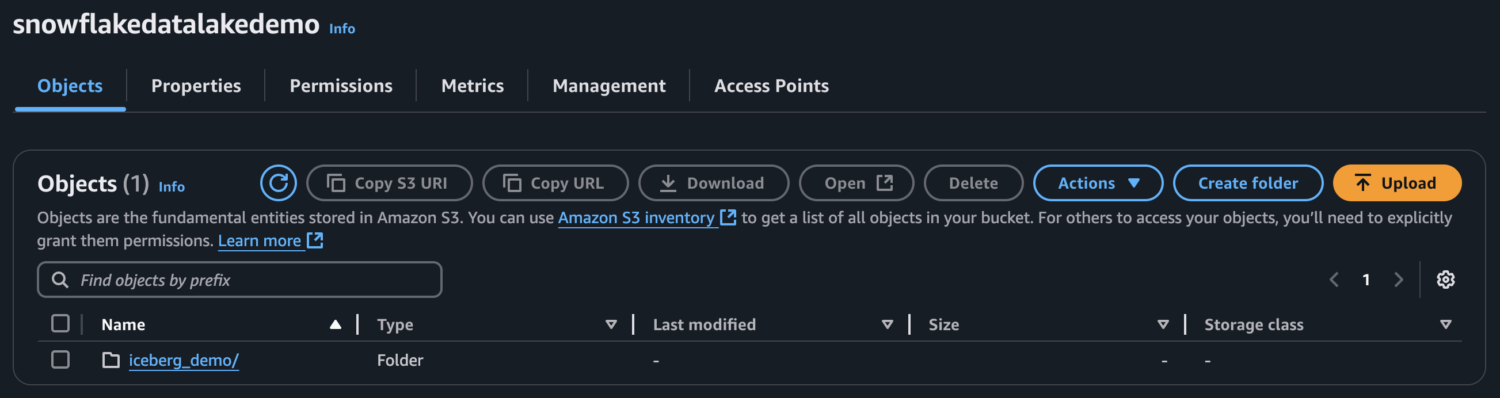
The result of this CREATE statement is a table in Snowflake called employees, and a folder called iceberg_demo in our external storage account containing data and metadata files.

If we now select data from this table, Snowflake will use the data and metadata in the external storage account to construct the table.

dbt and Iceberg tables
You might be wondering: Why use dbt with Apache Iceberg tables in Snowflake?
The answer is simple—dbt’s transformation and orchestration capabilities complement Apache Iceberg’s flexible and performant data management layer in Snowflake. Together, they create a powerful solution for efficiently managing and transforming large-scale data.
Now that we’ve seen how to create an Iceberg table and understand why it pairs well with dbt, let’s put it into practice.
Starting from version 1.9, the dbt-snowflake and dbt-core adapters support Iceberg tables through three materializations: table, incremental, and dynamic. To enable Iceberg table creation, we need to set a specific flag in the dbt_project.yml file. Without this flag, dbt will return an error when attempting to create an Iceberg table.
					flags:
  enable_iceberg_materializations: True
The structure of dbt models remains largely unchanged compared to regular tables. The only difference is the addition of specific configuration values in the config block. These include specifying the table format and defining the external volume.
					{{
config(
        alias='employees_dbt',
        schema="demo",
        materialized="table",
)
}}
					{{
config(
        alias='employees_dbt_iceberg',
        schema="demo",
        table_format="iceberg",
        external_volume='iceberg_volume',
        materialized="table",
)
}}
You might wonder if we’re missing a parameter since we haven’t explicitly defined a base location, as we did when creating an Iceberg table in Snowflake. However, this isn’t necessary—dbt automatically generates a base location in the format _dbt/{schema_name}/{model_name}/.

However, there is a configuration option called base_location_subpath that allows you to extend this path. This setting appends the specified string to dbt’s default base path, enabling more customized directory structures. You can also create nested folders by using a slash (/) between name values.
					{{
config(
        alias='employees_dbt_iceberg',
        schema="demo",
        table_format="iceberg",
        external_volume='iceberg_volume',
        materialized="table",
        base_location_subpath="iceberg/table"
)
}}
In this example the path in our external storage would be ‘_dbt/{schema_name}/{model_name}/{base_location_subpath}’ which is equivalent to

If we now run this dbt code, we will be using dbt in Snowflake to create an iceberg table, which will be indistinguishable from a normal table.
					{{
config(
        alias='employees_dbt_iceberg',
        schema="demo",
        table_format="iceberg",
        external_volume='iceberg_volume',
        materialized="table",
        base_location_subpath="iceberg/table"
)
}}

with
    final AS (
        SELECT
            *
        FROM {{ ref("demo_source") }}
)

SELECT
    *
FROM
    final
Conclusion
Apache Iceberg tables bring a powerful open table format to Snowflake, providing a flexible and efficient way to manage data stored externally in cloud storage. This blog has demonstrated how to set up and manage Iceberg tables both directly in Snowflake and through dbt. And while there were a few extra configuration steps to go through, it offers significant benefits in terms of scalability and data management.
Integrating Iceberg support into dbt simplifies the creation and management of these tables, allowing teams to leverage dbt’s model-driven approach while retaining the benefits of Iceberg’s architecture.
As organizations continue to seek more flexible and open data architectures, the combination of Snowflake, Apache Iceberg and dbt provides a compelling solution for managing large-scale, cloud-based data systems.